Creating Barrier-Free Homes: A Guide to Handicap Access
May 21, 2024
Upgrade Your Home with CAPS Remodeling’s Wheelchair Ramp Service
June 5, 2024Creating a handicap-accessible bathroom ensures safety, comfort, and independence for individuals with disabilities.
Whether you’re accommodating aging in place or making your home more inclusive, thoughtful bathroom design can make all the difference.
From installing essential handrails to choosing the right flooring, every detail matters.
Keep reading to discover critical tips for remodeling your bathroom to enhance accessibility without compromising style.
Choose the Right Flooring for Safety and Accessibility
Choosing the right flooring for your handicap-accessible bathroom remodel is crucial for safety and comfort.
Prioritizing non-slip materials can significantly reduce the risk of falls, a primary concern for individuals with disabilities.
Additionally, heated floors offer an added comfort layer, ensuring the bathroom remains warm and cozy, especially in colder months.
Combining these features effectively enhances accessibility and promotes overall well-being in the space.
Prioritize Non-Slip Materials to Prevent Falls
Ensure safety when it comes to handicap-accessible bathrooms. I always recommend selecting non-slip flooring materials to minimize the risk of falls. This is especially critical in wet areas where water spills are common.
Some excellent non-slip flooring options include:
- Textured vinyl
- Non-slip ceramic tiles
- Rubber flooring
These materials balance safety and aesthetics, making your bathroom secure and visually appealing. Additionally, waterproofing should be considered to enhance the safety of the floor further.
Consider Heated Floors for Added Comfort
Heated floors can provide additional comfort, especially in colder months. For individuals with disabilities, stepping onto a warm floor can enhance the overall bathing experience, reducing the discomfort that may come with cold surfaces.
Implementing heated floors can also be a practical decision for caregivers, contributing to a more comfortable and inviting environment. This enhancement not only boosts comfort but also adds value to the bathroom renovations.
Install Grab Bars in Essential Locations
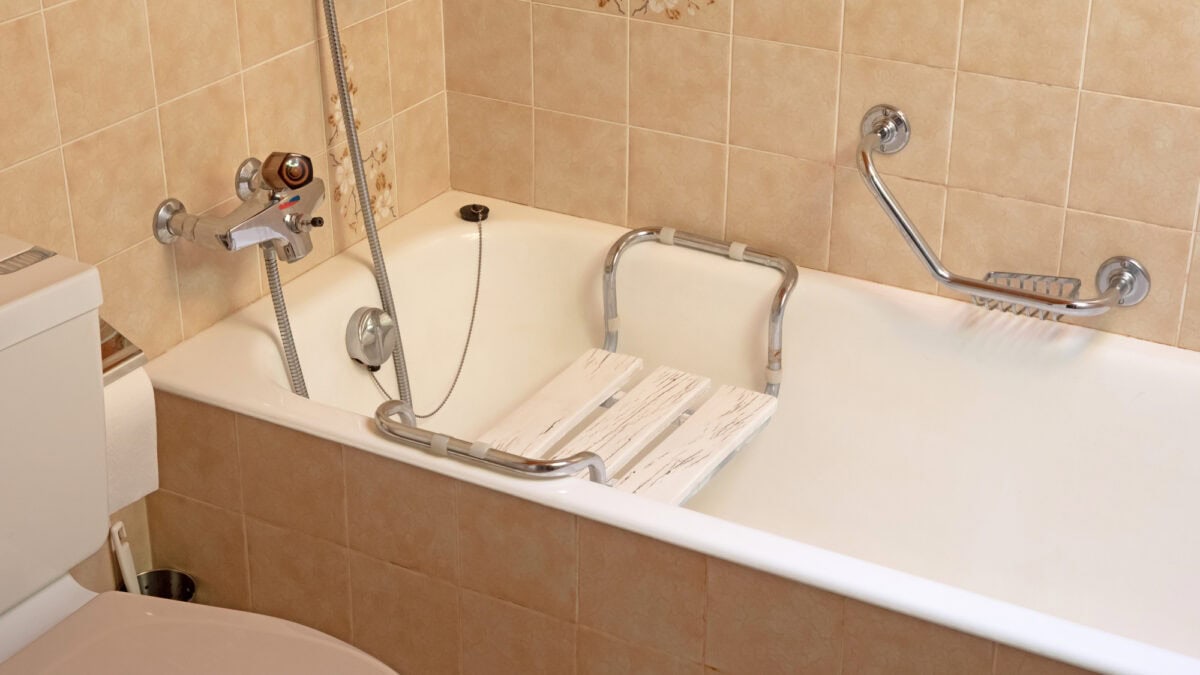
When remodeling a bathroom for accessibility, installing grab bars in critical areas such as the shower, tub, and toilet zones can significantly enhance safety and independence.
It’s crucial to ensure these grab bars are securely anchored into wall studs to provide the necessary support and stability.
Properly installed grab bars assist with balance and movement and offer peace of mind for users and caregivers, mitigating the risk of falls and accidents.
Focus on Shower, Tub, and Toilet Areas
When focusing on accessible design for showers, tubs, and toilets, installing sturdy grab bars is non-negotiable. These bars must be strategically placed to assist with entering and exiting the bathtub or shower and to provide support near the toilet.
Anchoring grab bars into wall studs ensures they can support substantial weight, preventing potential accidents. High-quality materials like stainless steel or powder-coated metal can further enhance durability and resistance to rust.
Ensure Secure Anchoring Into Wall Studs
When installing grab bars in a handicap-accessible bathroom, anchoring them into wall studs is crucial to ensure they can bear significant weight. Proper anchoring provides the necessary support to prevent accidents and offers peace of mind. You can achieve a sturdy and reliable installation by using high-quality tools such as a drill and appropriate hardware.
| Installation Step | Details | Tools Required |
|---|---|---|
| Locate Wall Studs | Use a stud finder to identify the positions of wall studs. | Stud Finder |
| Mark Positions | Mark the points where the grab bars will be installed. | Level, Pencil |
| Drill Holes | Use a drill to create holes for the mounting hardware. | Drill, Appropriate Drill Bits |
| Install Grab Bars | Screw the grab bars into the wall studs securely. | Screws, Screwdriver |
This process ensures the grab bars are securely anchored and capable of providing the necessary support. Corrosion-resistant materials like stainless steel can also offer additional durability and ease of maintenance, enhancing the bathroom’s functionality and safety.
Opt for a Walk-in Tub or Roll-in Shower
Choosing a walk-in tub or roll-in shower can significantly enhance accessibility in a bathroom.
As I began evaluating the best options based on mobility needs, I considered the ease of entry and what specific features would enhance user comfort and safety.
Including seating and handheld showerheads further tailors the experience to the individual’s requirements, offering a practical yet dignified solution.
This setup can be particularly beneficial for those with limited mobility, ensuring that every part of the bathing process is accessible and manageable.
Evaluate the Best Options Based on Mobility Needs
Choosing between a walk-in tub and a roll-in shower depends significantly on the individual’s mobility requirements. With its low threshold and built-in seat, a walk-in tub is ideal for those who can sit but have difficulty stepping over traditional tub walls. Conversely, a roll-in shower, which offers easy wheelchair access and barrier-free entry, is better suited for individuals who use a wheelchair or have severe mobility restrictions.
Include Seating and Handheld Showerheads
When designing a handicap-accessible bathroom, including seating and a handheld showerhead can significantly enhance user comfort and independence. A built-in or fold-down seat in a roll-in shower or walk-in tub provides a stable and safe place to sit, reducing the risk of falls during bathing. Additionally, the convenience of a handheld showerhead allows for greater flexibility and control, making the bathing process more manageable for those with limited mobility.
Adapt Sink Height and Clearance for Wheelchair Users
Adapting sink height and clearance is critical for creating a wheelchair-accessible bathroom.
Ensuring the dimensions comply with ADA guidelines makes the sink easily reachable for wheelchair users, providing a seamless experience.
Lever-handle faucets offer an additional convenience layer, enabling easier operation for individuals with limited hand strength or dexterity.
This combination of proper height and user-friendly fixtures helps foster an independent and comfortable environment.
Check ADA Guidelines for Proper Dimensions
When adapting the sink height for wheelchair accessibility, it is crucial to follow ADA guidelines. These standards ensure that the sink is at an appropriate height so that it is easily reachable by individuals in wheelchairs, promoting an independent and comfortable environment. Additionally, the clearance beneath the sink must accommodate the dimensions of a wheelchair, allowing for easy maneuverability.
Ensuring proper dimensions is vital for inclusivity and functionality. Here is a summary of ADA guideline specifications for sink height and clearance:
| Requirement | ADA Standard |
|---|---|
| Sink Height | 34 inches maximum from the floor |
| Minimum Knee Clearance Height | 27 inches from the floor |
| Minimum Clear Floor Space | 30 inches x 48 inches |
| Depth | 17 to 25 inches |
Use Lever-Handle Faucets for Easier Operation
Lever-handle faucets are a practical choice for individuals with limited hand strength or dexterity. These faucets are more accessible to operate compared to traditional knobs, as they require minimal force and can often be managed with a single hand. This design consideration helps promote independence and convenience in daily bathroom use.
Choosing lever-handle faucets can significantly enhance the overall accessibility of a bathroom for wheelchair users. The ease of use is not only beneficial for those with disabilities but also for aging individuals who may face declining strength.
- Easy operation with minimal force
- It can be managed with one hand
- Promotes independence and convenience
By integrating these faucets, we can ensure that the bathroom remains user-friendly and meets the needs of all occupants. This small yet impactful change contributes significantly to the space’s overall functionality and accessibility.
Improve Lighting With User-Friendly Controls
To create a truly handicap-accessible bathroom, improving lighting is fundamental.
Cleverly positioning lights to eliminate shadows ensures every corner is visible, reducing the risk of slips and falls.
Adding motion sensors or easy-to-reach switches can further enhance usability, allowing individuals with limited mobility to control lighting effortlessly.
We can achieve a safe, well-lit environment accommodating all needs by integrating these user-friendly controls.
Cleverly Position Lights to Eliminate Shadows
Proper lighting is crucial in a handicap-accessible bathroom. By strategically positioning lights, we can minimize shadows, reducing the risk of slips and falls. This approach enhances safety and makes the bathroom feel more welcoming and comfortable for all users.
In addition to overhead lighting, consider installing wall-mounted fixtures near mirrors and shower areas for better illumination. This helps maintain consistent brightness throughout the space, allowing for more straightforward navigation and greater peace of mind. Consider these lighting best practices:
| Lighting Area | Purpose |
|---|---|
| Overhead Lights | General illumination |
| Wall-Mounted Fixtures | Task lighting near mirrors and shower |
| Motion Sensors | Automatic lighting control |
Utilizing motion sensors or easy-to-reach switches enhances usability, allowing individuals with limited mobility to control lighting effortlessly. This smart lighting strategy ensures that the bathroom remains accessible and functional for everyone.
Add Motion Sensors or Easy-to-Reach Switches
Incorporating motion sensors or strategically placed, easy-to-reach switches in a handicap-accessible bathroom can greatly enhance usability. These features allow users to control lighting effortlessly, especially for individuals with limited mobility or dexterity. This ensures the bathroom remains user-friendly and accessible to everyone.
Here are some key benefits of integrating these lighting solutions:
| Feature | Benefit |
|---|---|
| Motion Sensors | Automatic light activation without needing to touch a switch |
| Easy-to-Reach Switches | Convenient for users with limited reach or hand strength |
| Energy Efficiency | Ensures lights are only on when needed, reducing power consumption |
By implementing these smart lighting controls, I can provide a safer, more comfortable environment that caters to the needs of all bathroom users. Making thoughtful choices in lighting design significantly improves the space’s functionality and accessibility.
Essential Tips for a Handicap Accessible Bathroom Remodel
When remodeling a bathroom to accommodate individuals with disabilities, it’s essential to focus on safety and accessibility. Implementing universal design principles can ensure that the space is functional and inclusive for everyone. Prioritizing non-slip flooring, proper lighting, and easy-to-reach fixtures are crucial to creating a user-friendly bathroom.
Consider integrating key elements that promote independence and safety. For instance, selecting appropriate materials and products tailored to the user’s needs can make a significant difference. Essential features to include are:
- Non-slip flooring materials
- Grab bars securely anchored into wall studs
- Lever-handle faucets for easy operation
Additionally, it’s beneficial to adapt the sink height and provide adequate clearance for wheelchair users. Ensuring compliance with ADA guidelines can offer peace of mind and practicality. In doing so, the bathroom will meet legal requirements and deliver a comfortable and accessible environment for all users.
Creating a handicap-accessible bathroom remodel prioritizes the safety and independence of individuals with disabilities.
By incorporating non-slip flooring, securely anchored grab bars, and lever-handle faucets, we significantly enhance accessibility and functionality.
Adapting sink height and ensuring proper lighting further promote a user-friendly environment.
Implementing these essential tips ensures the bathroom meets both comfort and regulatory standards, providing a dignified and practical space for all users.

Introducing Jeff Cates, the visionary Founder and Owner of CAPS Remodeling. After experiencing a profound personal event involving his son in 2007, Jeff was inspired to serve a higher purpose: to create safer, more comfortable, and independent living conditions for the elderly and disabled by modifying their current homes. Jeff’s deep-seated religious beliefs form the moral compass that steers CAPS daily operations. Apart from his unwavering dedication to his work, Jeff finds joy in boating and cherishing moments with his family.


