Upgrade Your Home with CAPS Remodeling’s Wheelchair Ramp Service
June 5, 2024
Accessible Bathroom Upgrades in Madison Heights, MI
June 18, 2024As we embrace aging with grace or manage the challenges associated with disability, safety in the haven of our homes takes on a monumental significance.
With its slippery surfaces, the bathroom becomes a focal point for my concern, particularly when considering the well-being of a loved one with limited mobility or someone recuperating from surgery.
Installing grab bars can instill confidence and independence, reducing the risk of falls and injuries.
In my toolbox of home improvement tips, I’m ready to share the nuts and bolts of choosing robust grab bars and how to anchor them securely to your walls.
Keep reading to learn the precise steps to transform your bathroom into a bastion of accessibility and safety.
Choosing the Right Grab Bars for Safe Elderly Care
Embarking on the home improvement journey, particularly to age in place or accommodate a disability, involves key decisions that can profoundly impact the user’s everyday safety and confidence.
Installing grab bars is an essential task when focusing on bathroom modifications.
I’ve seen firsthand the transformative effect they can have, not just for my elderly patients but for anyone with mobility concerns.
Before diving into the physical installation, a thorough evaluation of the bathroom layout is imperative to ensure optimal grab bar placement, taking into account crucial areas such as the shower, bathtub, and toilet.
Equally important is the selection of materials—robust stainless steel or warm-to-touch bronze, and grip styles that assert comfort and safety.
Such fastidiousness in choice guarantees a harmonious balance between practicality and an individual’s unique needs, affording peace of mind with every use.
Evaluating the Bathroom Layout for Grab Bar Placement
Assessing the existing bathroom layout is much like solving a complex puzzle – it requires a strategic eye to pinpoint the exact locations where support is most needed. In my meticulous approach, I investigate the proximity of wall studs since they’re the backbone for securing those stainless steel lifesavers. It’s imperative to contemplate the routines of the person who’ll rely on these grab bars, whether for assistance in transferring from a wheelchair or simply maintaining balance while standing. Each movement dictates a specific position and height of the grab bar for maximum safety.
Selecting Materials and Grip Styles for Comfort and Safety
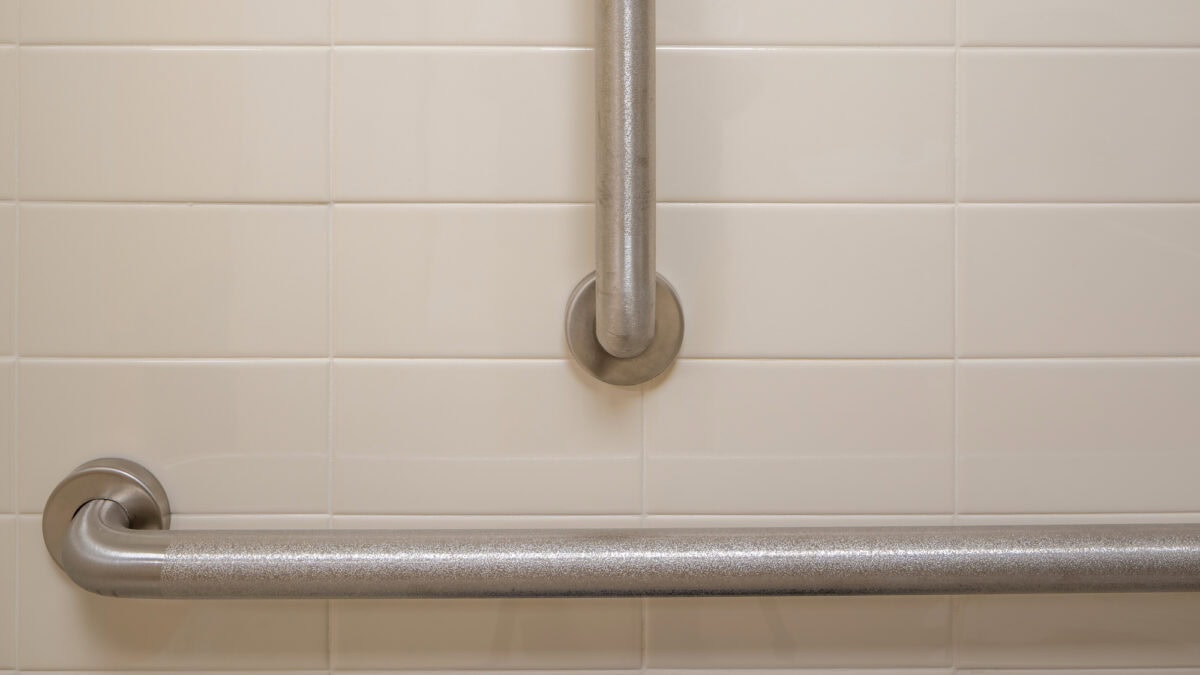
Navigating the array of materials for grab bars can be as critical as the installation process itself. I carefully select high-quality materials, like durable stainless steel or sleek nickel, ensuring they meet the dual demands of strength and aesthetic appeal. Fabrication is another aspect; a non-slip, textured grip design is paramount, as it provides the necessary friction to prevent an accident when hands are wet; contrastingly, a smoother finish might best suit those with sensitive skin. The common goal here is to offer unwavering safety without compromising on the comfort or personal preference of the user, allowing them to maintain their dignity and independence.
Tools and Materials Needed to Install Grab Bars
When transitioning to the hands-on phase of home improvement for safety, it’s crucial to have the right tools for installing grab bars.
Just as a surgeon meticulously prepares their toolkit before surgery, I compile an inventory of items essential for a seamless installation—ranging from a reliable drill and various bit sizes to ensure precise pilot holes to levels that keep each bar straight and true.
Equally important is catering to the specific needs of diverse wall materials; whether it’s anchoring a bar through tile, fiberglass, or drywall, I select the appropriate fasteners and anchors that ensure a rock-solid fixture, thereby preventing the risk of injury from a grab bar that gives way under pressure.
My bow to privacy and self-reliance for my clients impels me to equip my repertoire with every necessary tool and material. A well-installed grab bar is more than steel affixed to a wall—it’s a handrail for confidence and independence.
Listing Essential Tools for Installation
Embarking on the task, I arm myself with a dependable drill, precisely matched drill bits, and a stud finder – crucial tools for securely identifying those concealed wall studs to anchor the grab bars. The availability of various fasteners and anchors in my toolkit addresses the diverse nature of bathroom surfaces, from solid tiles to the more pliable fiberglass or standard drywall. This proactive preparation ensures that I am equipped to tackle the complexity and variability of any bathroom without hesitancy or undue risk.
Identifying Supplementary Materials for Different Wall Types
Matching appropriate supplementary materials to the bathroom’s wall types is not just about visual harmony; it’s about ensuring the utmost security for those who depend on them. Every variable demands attention and a meticulous choice of hardware, from selecting the suitable anchor that promises zero movements in a solid wall stud to carefully calibrating hollow wall fasteners for areas without studs.
| Wall Type | Material | Anchor Type | Considerations |
|---|---|---|---|
| Tile | Ceramic or Porcelain | Wall anchor or toggle bolt | Prevent tile cracking; use a diamond-tipped drill bit |
| Fiberglass | Plastic-based | Hollow wall anchor | Use a backing board behind the wall for increased support |
| Drywall | Gypsum plasterboard | Toggle or molly bolt | Locate wall studs; ensure weight distribution |
| Solid Wood | Natural Wood | Screws | Directly secure to studs; pre-drill to avoid splitting |
In each scenario, I thoroughly assess and apply the most compatible solutions, ensuring the grab bars stand as unyielding guardians against slips and falls, essential in a space where water and sleek surfaces increase the risk of accidents.
Preparing Your Space Before Installing a Grab Bar
Guiding a homeowner through reinforcing their space for elderly care is both a responsibility and a privilege.
As I approach the critical preparation stage before installing grab bars, my focus sharpens on the wall.
My primary task here is to locate the wall studs thoroughly. These will serve as the foundation for a secure mount—an absolutely non-negotiable step to ensure the safety of those who will grip these bars in search of stability.
Equally vital is ensuring that the surfaces where these bars will adhere are clean and bone dry. The slightest residue or moisture can compromise the adhesive’s seal and the anchors’ firm hold.
It’s not just about installing a support tool; it’s about crafting an enduring bulwark against the risk of bathroom accidents.
Marking Stud Locations in the Wall
Marking the precise locations of the wall studs is a process I approach cautiously: a false start here could spell trouble down the line. Using an electronic stud finder, I glide it across the wall’s surface, marking each discovered stud with a small piece of painter’s tape.
Once I’m confident in the accuracy of my marks, I arm myself with a level, drawing vertical lines to indicate the exact drilling points for secure grab bar installation:
- Scanning the wall thoroughly with a stud finder to ensure precision.
- Clear, non-damaging painter’s tape was applied to the wall to signal each stud’s location.
- Using a level to extend the stud marks vertically, mapping out the ideal height and alignment for support bars.
Ensuring Clean and Dry Surfaces Before Installation
The integrity of a grab bar installation can be significantly impacted by the condition of the surface to which it’s attached. Therefore, before drilling any holes, I diligently wipe down the area with a clean cloth and an appropriate cleaner, followed by a thorough drying. This step not only enhances the adherence of mounting hardware but also helps prevent any moisture-related deterioration over time, ensuring a steadfast and reliable support system for years to come.
Step-by-Step Guide to Installing Horizontal Grab Bars
Moving onto the hands-on segment of ensuring safety within the bathroom, let’s talk about installing horizontal grab bars.
I’ve learned that the crux of a solid install hinges on two pivotal steps: precisely drilling pilot holes into the wall studs and securing the grab bar flanges firmly in place.
These actions form the bedrock of a support system that elderly individuals can trust implicitly.
The thrill of transforming a space for utmost safety never fades for me; with each grab bar mounted securely, I’m fortifying the sanctuary of someone’s bathroom.
Now, I’ll walk you through these critical stages, ensuring you have the confidence to tackle this crucial project with the finescentteredness of a skilled handyman.
Drilling Pilot Holes in Designated Stud Areas
With my stud locations identified and marked, it’s time to prepare for the actual setting of the grab bars—a process that begins with drilling pilot holes. The pilot holes are essential to ensure that the screws will fasten securely and without damaging the wall or the studs beneath. I carefully select a drill bit that is slightly smaller than the screw intended for use to preserve the wood’s integrity and provide a tight fit. Precise drilling at this stage sets the foundation for a robust and dependable grab bar installation:
- Select a drill bit slightly smaller than the screw’s diameter.
- Position the drill perpendicular to the wall to ensure straight pilot holes.
- Drill into the center of the stud markings to a depth that matches the length of the grab bar screws.
Securing the Grab Bar Flanges With Screws or Bolts
Once the pilot holes are in place, attaching the flanges of the grab bar is the critical next step: a rare combination of finesse and strength is necessary here. I align the grab bar flanges with the pilot holes and start securing them using screws or bolts designed for the specific weight and pressure a grab bar must support. By turning each screw firmly with the Drill, I am locking the potential for unwavering stability directly into the structure of the bathroom itself.
| Step Number | Action | Tool Used | Objective |
|---|---|---|---|
| 1 | Align flanges with pilot holes | None | Prepare for secure attachment of grab bar |
| 2 | Insert screws or bolts through flanges | Screwdriver or Drill | Begin fastening the grab bar to the wall |
| 3 | Tightly secure screws or bolts | Drill | Ensure the grab bar is anchored firmly |
These deliberate actions make the bathroom safer for older people, reinforcing their courage to maintain self-sufficiency within their cherished homes.
How to Install Vertical or Angled Grab Bars Properly
After properly securing horizontal grab bars, it is just as critical to focus on installing vertical or angled grab bars.
These provide additional safety and support for different movements within the bathroom environment.
As I approach this task, I prioritize determining the specific heights and angles that will cater to the individual’s needs, whether for assistance during transfers to a transfer bench or simply for added stability.
It’s about personalizing each grab bar placement to the user’s range of motion and ease of reach.
Adhering to rigorous safety guidelines, I carefully plot out and attach these bars, ensuring they are as robust and reliable as their horizontal counterparts, all while keeping a keen eye on the integrity of the installation so that those who use them can do so with unshakable trust.
Measuring User-Specific Heights for Custom Installation
As I consider the unique requirements of each individual who will depend on these grab bars, I take great care to measure and mark the exact heights that align with their natural reach and the level of support needed. This personalized approach ensures that the grab bars will be installed at a height that is compliant with ADA recommendations and tailored to the individual’s physical capabilities, enabling them to navigate their bathroom environment with complete confidence and ease.
Attaching Vertical or Angled Bars Following Safety Guidelines
Attaching vertical or angled grab bars demands scrupulous adherence to safety guidelines that safeguard their function in critical moments. I meticulously drill and mount each bar to ensure they can endure the dynamic pressures of everyday use, whether aiding in a vertical lift or supporting a diagonal lean. My careful anchoring to wall studs and using the correct fasteners form the cornerstone of trust in the bars’ stability, allowing users to lean on them confidently without the shadow of a slip or fall.
Installing grab bars in your home is a proactive measure that significantly enhances the safety and independence of elderly individuals.
By carefully selecting materials, ensuring proper placement, and employing a meticulous installation process, these aids become steadfast supports within a bathroom setting.
Precision in mounting them to wall studs and attentiveness to the user’s specific needs guarantee a customized and reliable solution to prevent falls.
Installing grab bars is not just a home improvement project; it’s a vital investment in the confidence and well-being of our loved ones as they age in place.
A grab bar is vital for enhancing safety and independence in elderly care. By following proper installation techniques, you can ensure secure support for your loved ones. For Madison Heights and Detroit residents, CAPS Remodeling offers professional services to make homes safer and more accessible. Trust our expertise to provide peace of mind and improved mobility for elderly family members.

Introducing Jeff Cates, the visionary Founder and Owner of CAPS Remodeling. After experiencing a profound personal event involving his son in 2007, Jeff was inspired to serve a higher purpose: to create safer, more comfortable, and independent living conditions for the elderly and disabled by modifying their current homes. Jeff’s deep-seated religious beliefs form the moral compass that steers CAPS daily operations. Apart from his unwavering dedication to his work, Jeff finds joy in boating and cherishing moments with his family.


